Handling Incoming Webhooks: The Controller Layer
- 7 mins read💡 See the code for this post on the 🔗 webhook-controllers branch.
In the previous chapter, we set up our models to store webhooks and their requests. Now it’s time to build the controllers that will handle incoming HTTP requests and show them to users.
Setting Up Routes
The webhookdump will have two types of URLs. First, the URL that serves actual HTTP callbacks from clients. Second, the URL to manage or show the webhook’s detailed information. For example, when a client sends a webhook to webhookdump.link/abc-123, users can view all received requests at webhookdump.link/v/abc-123. This separation makes it clear which URL is for receiving webhooks and which is for viewing them.
Here’s how I configured config/routes.rb:
Rails.application.routes.draw do
  root "home#index"

  # Interface for viewing webhook details under 'v' prefix
  scope path: 'v', controller: 'webhooks' do
    get '/:slug', action: :show, as: :webhook
    delete '/:slug', action: :destroy

    resources :webhook_requests, only: [:show, :destroy],
              path: '/:slug',
              controller: 'webhook_requests'
  end

    # Main webhook endpoint - keeps URLs as clean as possible
  match '/:slug', to: 'webhooks#handler', via: :any, as: :webhook_handler
end
This routing setup works really well for our needs. When external services want to send webhooks, they can use the shortest possible URL without any extra path segments. Meanwhile, users can easily view their webhook details by adding ‘v’ to the URL path. This clear separation helps prevent confusion between sending and viewing webhooks.
💡 If you’re familiar with Rails or any other web frameworks, you might notice that this routing setup breaks some conventional patterns. Typically, Its encourages RESTful routes with resourceful naming - you’d expect paths like
/webhooks/:idinstead of our direct/:id. While following conventions is generally a good practice, I chose to break from it here for a specific reason: user experience.
When developers are copying webhook URLs to paste into third-party services or sharing them with team members, every extra character counts. Having to explain “make sure to include /webhooks/ in the URL” adds unnecessary complexity. By keeping the webhook endpoint as short as possible (/:id), we make the URLs more user-friendly and easier to work with. The viewing interface under /v/ is a fair compromise - it’s still short but clearly separated from the main webhook endpoint.
The Webhooks Controller
The WebhooksController is the heart of our application. It needs to handle two crucial tasks: showing webhook details to users and processing incoming webhook requests from external sources. Let me walk you through how I built it.
Here’s how I implemented it:
class WebhooksController < ApplicationController
  include ApplicationHelper

  before_action :get_webhook!

  skip_before_action :verify_authenticity_token, only: [:handler]

  def show
    @webhook_requests = @webhook.webhook_requests.order(id: :desc)
  end

  def handler
    @webhook_request = @webhook.webhook_requests.create!(
      url: request.url,
      ip: request.remote_ip,
      method: request.method,
      host: request.host,
      headers: request.headers.to_h,
      query_params: request.query_parameters.to_json,
      payload: request.body.read
    )

    render plain: "OK"
  end

  private

  def get_webhook!
    @webhook = Webhook.find_by!(slug: params[:slug])

    if @webhook.expired?
      raise WebhookExpired
    end
  end
end
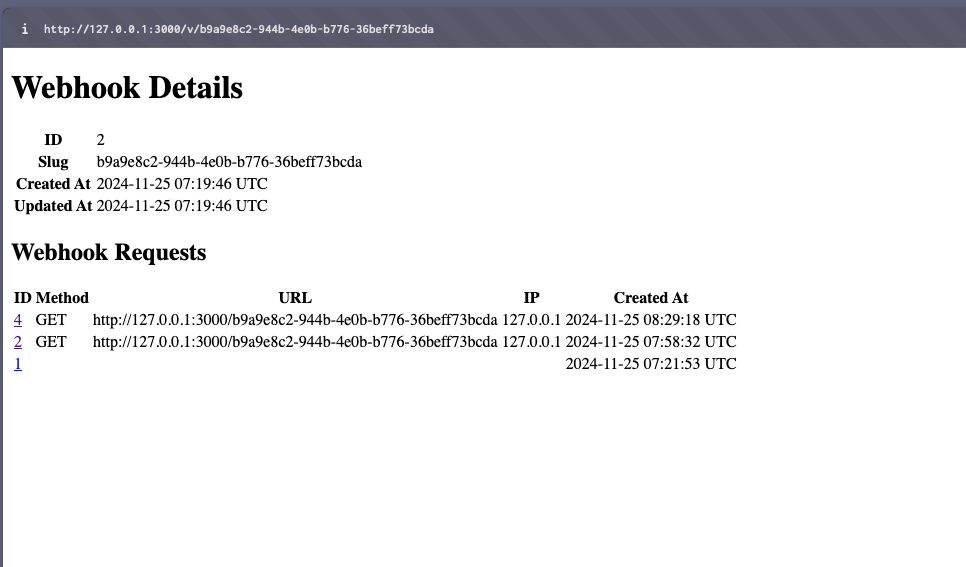
<h1>Webhook Details</h1>

<table>
  <tr>
    <th>ID</th>
    <td><%= @webhook.id %></td>
  </tr>
  <tr>
    <th>Slug</th>
    <td><%= @webhook.slug %></td>
  </tr>
  <tr>
    <th>Created At</th>
    <td><%= @webhook.created_at %></td>
  </tr>
  <tr>
    <th>Updated At</th>
    <td><%= @webhook.updated_at %></td>
  </tr>
</table>

<h2>Webhook Requests</h2>
<table>
  <thead>
    <tr>
      <th>ID</th>
      <th>Method</th>
      <th>URL</th>
      <th>IP</th>
      <th>Created At</th>
    </tr>
  </thead>
  <tbody>
    <% @webhook_requests.each do |webhook_request| %>
      <tr>
        <td><%= link_to webhook_request.id, webhook_request_path(@webhook.slug, webhook_request) %></td>
        <td><%= webhook_request.method %></td>
        <td><%= webhook_request.url %></td>
        <td><%= webhook_request.ip %></td>
        <td><%= webhook_request.created_at %></td>
      </tr>
    <% end %>
  </tbody>
</table>

Let’s break down the interesting parts:
- We skip CSRF protection for the
handleraction since external services need to send requests - The
showaction displays webhook requests in reverse order - The
handleraction captures all important request details:- URL, IP address, and HTTP method
- Request headers
- Query parameters
- Request body
The WebhookRequests Controller
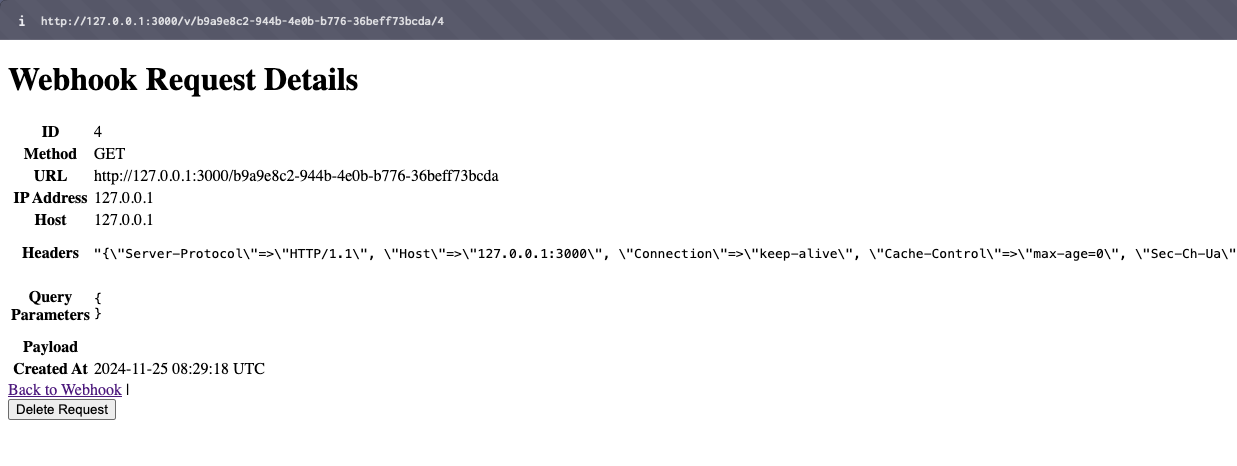
While the WebhooksController handles the main functionality, we also need a way for users to manage individual webhook requests. That’s where the WebhookRequestsController comes in. It helps users view request details and clean up old requests they don’t need anymore.
class WebhookRequestsController < ApplicationController
  before_action :get_webhook!
  before_action :get_webhook_request!

  def show; end

  def destroy
    @webhook_request.destroy

    redirect_to webhook_path(@webhook), notice: 'Webhook request deleted'
  end

  private

  def get_webhook!
    @webhook = Webhook.find_by!(slug: params[:slug])
  end

  def get_webhook_request!
    @webhook_request = @webhook.webhook_requests.find!(params[:id])
  end
end
This controller:
- Shows detailed information about a specific request
- Allows users to delete requests they don’t need anymore
Testing the Controllers
Here’s how you can test the webhook endpoint using cURL:
# Create a test webhook first using the Rails console
$ rails c
> webhook = Webhook.create!(expired_at: 7.days.from_now)
> puts webhook.slug
abc123-xyz-789 # Your UUID will be different

# Send a test request
curl -X POST \\
  -H "Content-Type: application/json" \\
  -d '{"message":"Hello WebhookDump!"}' \\
  "<http://localhost:3000/abc123-xyz-789>"
If you visit http://localhost:3000/v/abc123/1 in your browser, you’ll see the request details!

Error Handling
One important aspect is handling expired webhooks. I created a custom error class:
class WebhookExpired < StandardError; end
And added error handling in application_controller.rb:
class ApplicationController < ActionController::Base
  rescue_from WebhookExpired, with: :webhook_expired

  private

  def webhook_expired
    render "errors/webhook_expired", status: :gone
  end
end
Now when someone tries to use an expired webhook, they’ll see a friendly error message instead of a crash.
In the next chapter, we’ll make our application more interactive by adding real-time updates with Action Cable when new webhook requests arrive.
Stay tuned! 🚀