WebhookDump: Database Design
- 3 mins read💡 See the code for this post on the 🔗 setup-models branch.
In this chapter of my journey, I began adding features to the Webhookdump application. The first step? Database design.
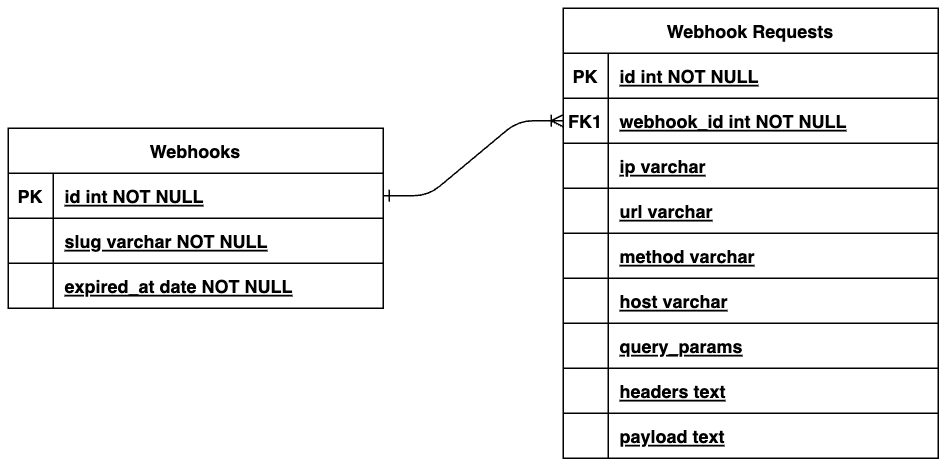
The design of the Webhookdump application is simple, requiring only two tables to store incoming HTTP request details.

Here are the definitions for each table, including the fields:
The webhooks table stores information about the webhook URL. It contains two main attributes: slug and expired_at.
slug: This string field uniquely identifies the webhook URL. For now, users receive an UUID as a slug. However, I plan to make the slug editable by the user in the future, so users can have readable URLs likewebhookdump.com/this-is-my-unique-slug.expired_atThis attribute stores the expiration date of the webhook link. Once the webhook link expires, it can no longer be used.
The second table, webhook_requests, stores incoming HTTP requests from the client, including information like the requester IP, URL, host, HTTP method, query params, headers, and the request body or payload. This table performs heavy write operations compared to the parent table.
Setup and models and database migration
Rails has an excellent code generator called rails scaffold. When you create a model using the scaffold script, it also generates the database migration.
$ rails generate model webhook slug:string expired_at:date
      invoke  active_record
      create    db/migrate/20240324005540_create_webhooks.rb
      create    app/models/webhook.rb
      invoke    test_unit
      create      test/models/webhook_test.rb
      create      test/fixtures/webhooks.yml
Here’s the migration file for the webhooks table:
class CreateWebhooks < ActiveRecord::Migration[7.1]
  def change
    create_table :webhooks do |t|
      t.string :slug
      t.date :expired_at

      t.timestamps
    end
  end
end
Next, I created the second model and migration.
rails generate model webhook_request webhook:references ip:string url:string host:string method:string query_params:text headers:text payload:text
      invoke  active_record
      create    db/migrate/20240324010414_create_webhook_requests.rb
      create    app/models/webhook_request.rb
      invoke    test_unit
      create      test/models/webhook_request_test.rb
      create      test/fixtures/webhook_requests.yml
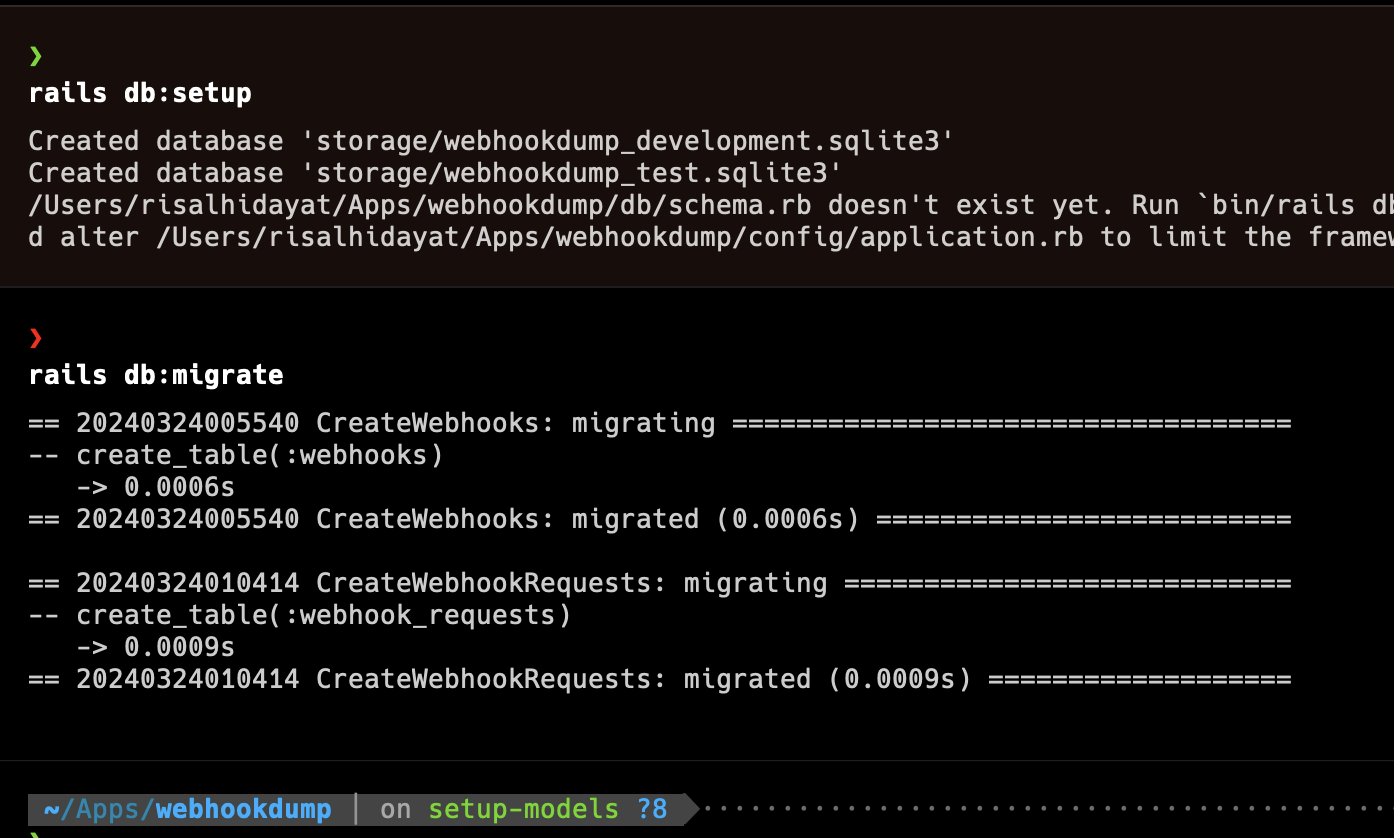
Then, I ran rails db:setup and rails db:migrate to set up and create the new tables in the SQLite database.

To validate that the model works as expected, I logged into the Rails console and tried to create a new webhook record.
$ rails console
Loading development environment (Rails 7.1.3.2)
irb(main):001> Webhook.create(slug: SecureRandom.uuid, expired_at: Time.now + 7.days)
  TRANSACTION (0.0ms)  begin transaction
  Webhook Create (0.4ms)  INSERT INTO "webhooks" ("slug", "expired_at", "created_at", "updated_at") VALUES (?, ?, ?, ?) RETURNING "id"  [["slug", "5b0d4da5-09f7-4549-a275-57cc950dd211"], ["expired_at", "2024-03-31"], ["created_at", "2024-03-24 01:12:05.816648"], ["updated_at", "2024-03-24 01:12:05.816648"]]
  TRANSACTION (0.1ms)  commit transaction
=>
#<Webhook:0x0000000127176b00
 id: 1,
 slug: "5b0d4da5-09f7-4549-a275-57cc950dd211",
 expired_at: Sun, 31 Mar 2024,
 created_at: Sun, 24 Mar 2024 01:12:05.816648000 UTC +00:00,
 updated_at: Sun, 24 Mar 2024 01:12:05.816648000 UTC +00:00>
irb(main):002>
And there it was - a new webhook record successfully created. This marked another milestone in my journey of building the Webhookdump application. Stay tuned for the next chapter where I’ll continue to enhance its functionality!